The Complete Guide
How to Build an Outdoor Kitchen
Every step from empty patio to first cookout, including the shortcuts most guides won't tell you about.
Updated July 2026 · 8 minute read
An outdoor kitchen turns your backyard into the room your family actually uses. But most guides make the process sound like a six-month construction project. It doesn't have to be. Here's the honest, complete path, including where you can skip the contractor entirely.
Step 1
Pick your location
Three things decide where your kitchen goes: proximity to the house (shorter trips with food and dishes), utility access (gas, water, and electric runs get expensive with distance), and wind direction (you don't want smoke blowing at your seating area or through open windows).
A covered patio or lanai is ideal: it extends your cooking season and protects your investment. If you're building in the open, plan for full sun exposure: surfaces get hot, and materials matter more.
Ventilation is non-negotiable. Grills under a roof need clearance and airflow per the manufacturer's specs, and cabinet ventilation openings must never be blocked. Check your grill's installation manual before you commit to a covered spot.
Step 2
Choose your layout
Layout drives everything else: cost, workflow, and how many people fit around the cook.
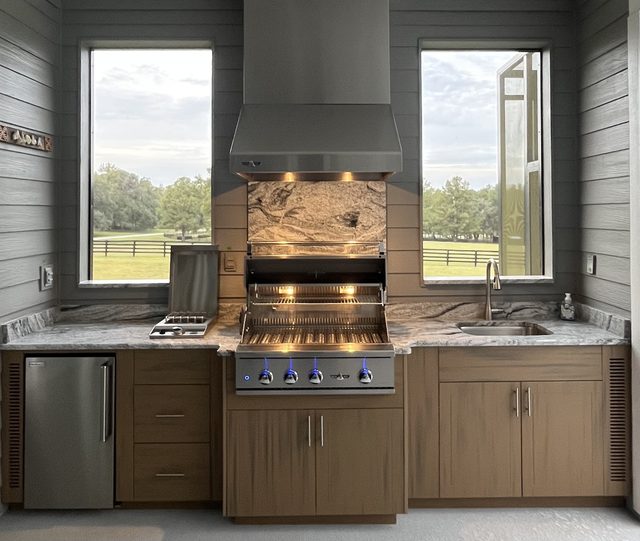
Straight run: the workhorse. A single line of cabinets along a wall, typically 5 to 8 feet. Best value per foot, easiest utility runs, fits almost any patio.
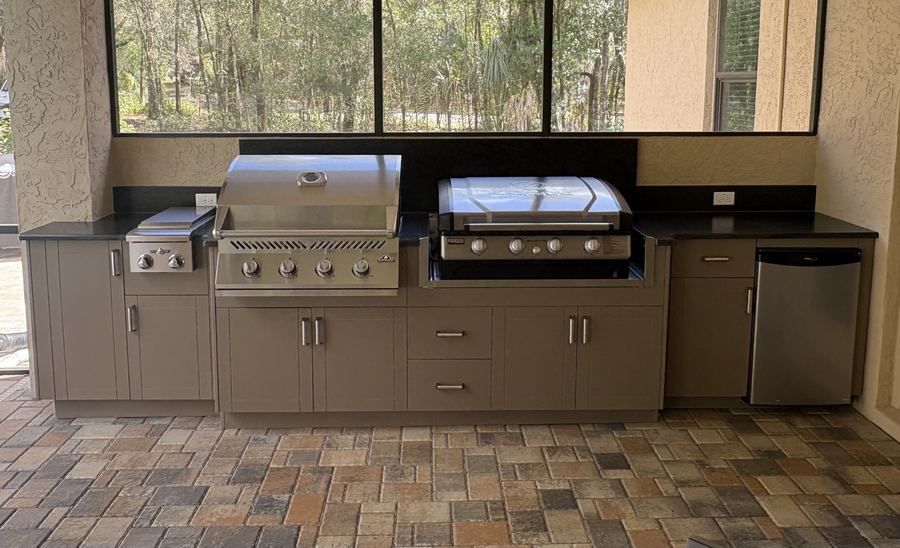
L-shape: adds a return leg for prep space or a refrigerator. Creates a natural gathering corner and separates the hot zone from the hangout zone.
Step 3
Decide how it gets built: the biggest fork in the road
This single decision changes your budget and timeline more than anything else:
| Path | Typical timeline | What it takes |
|---|---|---|
| Custom masonry (contractor): block and stone built on site | 6–16 weeks | Design fees, permits, multiple trades, daily site work |
| DIY frame kits: you assemble a steel frame, panel it, finish it | 2–6 weekends | Real construction skills, tools, and patience |
| Fully assembled cabinets: delivered as finished units, set in place | 1 day after delivery | Level ground and a helper. That's it. |
Masonry looks permanent because it is, including the price and the disruption. Fully assembled aluminum-frame cabinets deliver the same built-in look and outdoor durability without the jobsite. You set them, level them, connect the grill, and cook.
Step 4
Choose materials that survive outside
The outdoors destroys indoor materials. What actually lasts:
Frames: welded aluminum won't rust, rot, or feed termites: it's what marine builders use. Galvanized steel is second-best. Wood framing outdoors is a countdown clock.
Doors and panels: marine-grade HDPE poly board handles sun, rain, and salt air without fading, warping, or absorbing moisture. Stainless doors work but show every fingerprint and dent.
Countertops: granite and 304 stainless steel are the proven outdoor performers. Porcelain slabs are gaining ground. Skip laminate, butcher block, and standard quartz. UV and moisture ruin them.
 Real cabinet, AI enhanced
Step 5
Plan your appliances
Buy the grill you'll use, not the biggest one on the wall. A quality 32" built-in grill handles a family plus guests. Add from there in order of real-world value: side burner (sauces and sides without running inside), outdoor-rated refrigerator (drinks and prep storage), then extras like griddles.
One rule that saves money and headaches: stick to one appliance brand. Cutout dimensions, trim styles, and warranties align, and your kitchen looks intentional instead of assembled from a clearance rack.
Step 6
Handle gas, water, and codes
Whatever path you chose, this part stays professional: LP and natural gas connections should be made by a licensed plumber or qualified gas technician, and natural gas lines almost always require a permit. Electrical outlets near the kitchen need GFCI protection. If you're adding a sink, decide early whether it drains to the sewer (permit) or a dry well (check local code).
The good news: with fully assembled cabinets running on LP, many builds need no permits at all: the propane tank hides inside the cabinet, and there's no site construction to inspect. Confirm with your local building department; rules vary.
Step 7
Install and level
Masonry builds level themselves during construction. Modular and assembled cabinets need a reasonably flat surface. Quality units include adjustable leveling feet that absorb an inch or more of patio slope. Set the cabinets, level them, secure per manufacturer instructions, drop in the appliances, and make your gas connections (see step 6).
Step 8
The first cookout
Run the grill empty at high heat for 20–30 minutes to burn off manufacturing oils. Check every gas connection with soapy water: bubbles mean tighten. Then invite people over. The kitchen pays for itself in nights you don't want to end.
Frequently asked questions
Can I build an outdoor kitchen without a contractor?
Yes. Fully assembled outdoor cabinets ship as finished units. You place and level them yourself, then hire only a plumber for the gas connection if you're using natural gas. LP-based kitchens with a tank inside the cabinet often need no professional trades at all.
How long does it take to build an outdoor kitchen?
Contractor masonry builds typically run 6–16 weeks. DIY frame kits take several weekends. Fully assembled cabinets are cooking the day after delivery.
Do outdoor kitchens need a permit?
Usually only for the utilities: natural gas lines, new electrical circuits, and plumbed drains typically require permits. A freestanding assembled kitchen running on LP gas often doesn't. Always confirm with your local building department.
What's the best base for an outdoor kitchen?
Any solid, reasonably level surface: concrete slab, pavers, or a structural deck rated for the weight. Adjustable leveling feet on quality cabinets handle typical patio slopes up to about 1½ inches.
Skip to the finished kitchen.
Design your exact layout, finish, and appliances in about 5 minutes. Ships fully assembled. Free shipping.
Start your build →Keep reading
About these photosReal cabinets, welded and finished in our Homosassa shop. The door colors and the backyards behind them were created with AI, because our first kitchens have not been installed yet. Founding family photos will replace these as they come in.